


Ross
-
Posts
211 -
Joined
-
Days Won
35
Content Type
Profiles
Forums
Gallery
Downloads
Articles
Posts posted by Ross
-
-
5 hours ago, slotsmagic said:
I really should have been more in-depth when it came to how I've done things... but then again the Interplay will need gutting and redoing at some point!
So I've just measured my 27" IPS panel I use in the garage. It's 61x37cm (portrait). The 'space' I have in the Vegas Strip is 67x41cm.
So basically I can shove my spare 27" IPS panel in and only have minimal gap either side of the screen. In fact I'd almost be inclined to just leave the gap there since it's only a couple of CM either way with the screen in a central position.
I really had planned on running dual screen but I feel now it's going to be a pain in the arse.
Pros :
Single screen easier to drive, layouts will just display correctly with no issues.
Cons :
Will require me to remove parts of the top door.
Will lose touchscreen functionality.
Will need to potentially 'brace' the top door for strength.
Will need to either modify or make my own VESA type mount.
@Ross as someone who has run dual screens in a T7 cab - is it a case of each layout needing to be split in two to work correctly even with current MFME?
It's an annoying situation... I mean if I do convert a bunch of layouts to dual screen they will work if I decide to convert any of my other machines (for example the Storm cab) down the line - saving work there.
At the same time I feels like a fair bit of faff!!
for dual screens you would need to remake the layout i doubt any will split over two screens without modification due to the top glass being 70% of the art on most layouts.
all the layouts i built for my cab where heavily modified to split over the two screens. (res dont matter as long as both half's are the same size and width it should split over the two screens)-
 2
2
-
-
im using a £50 optiplex (i3) in one of my t7's and it seems to run most layouts ok (i say most i have only noticed slowdown on impact / monopoly) by the way, let me know if you do end up going dual screen (need to be the same res) i have about 14 layouts that are built for dual screen cabs, you can try the Caesars palace i uploaded a while back to see if it works on your setup.
-
-
Quick way is:
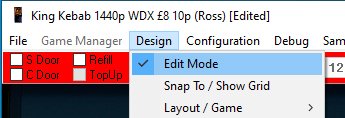
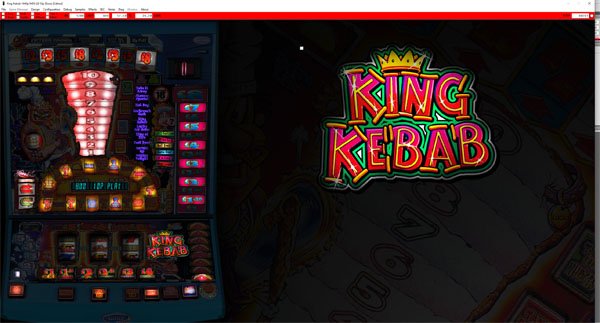
enable edit mode: Design > Edit Mode (bar will turn red when enabled)
Drag the window to required width
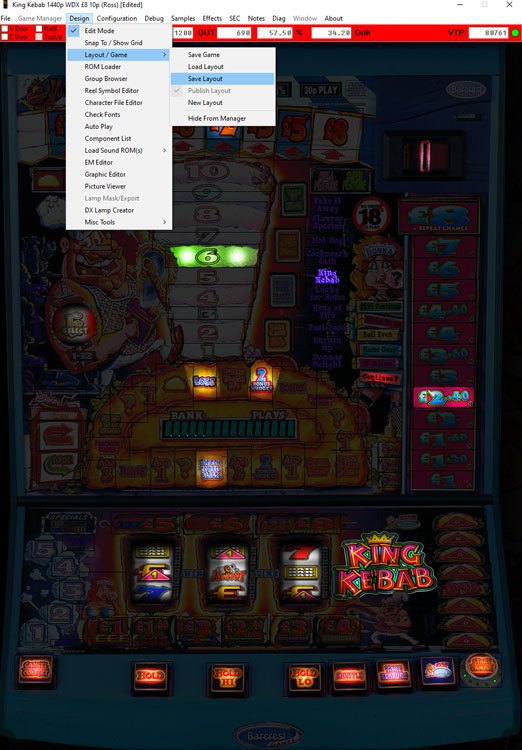
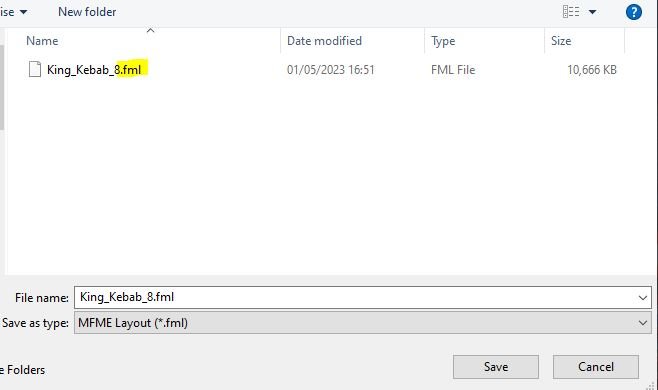
Save the layout: Design > Layout / Game > Save Layout (should default to the folder the layout is in) save over the current .fml file.
Done.
-
1
-
-
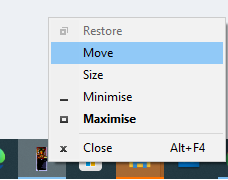
yeah i get his too, you can shift + right click the icon on the task bar then select move then move your mouse cursor over a tad then press and hold left or right arrow (you'll see why when you do it)
also the way i fix it (short term) is to set the resolution to the max monitor res but this wont work on alot of layouts as they are larger than native res.
-
1
-
-
here is what i tried, note i don't use c++ often (blue moon level rareness but the main idea is you need a switch statement) i added a suffix of '//++'.to lines changed by me so you can see what im trying.
note:
i assumed the pulses sent is in increments of 1000, if this is wrong you will need to change each case to the correct pulse count expected for that note as well as the 'min_cost_of_service' and 'max_cost_of_service' (min_cost_of_service = pulse count for £5 and max_cost_of_service = £50)
 #include <Keyboard.h>
/*

  This program expects pulses of logic high coming from a bill acceptor into pin 0 on an arduino leonardo.
  It counts the number of pulses, pretends to be a usb keyboard and sends an F3 keypress when enough total pulses have been received to pay for a service.

*/

// The pin on the arduino where CREDIT (-) [Common] is connected
#define INPIN (9)

int cents_per_pulse; // how many cents per pulse. for most bill acceptors this is 100 or $1 per pulse, but it can often be configured and coin acceptors will be different
int min_pulse_width; // the minimum pulse width to acccept
int max_pulse_width; // the maximum pulse width to accept
int debounce_speed; // ignore changes in input line state that happen faster than this
int pulse_count; // how many pulses have been received so far in this pulse train
//int cents_received; // Counts how many cents have been received//++
int cost_of_service; // Trigger service when this number of cents have been received
unsigned long pulse_duration; // how long was the last pulse
unsigned long pulse_begin; // when did the last pulse begin
unsigned long pulse_end; // if they pulse was within min and max pulse width, when did it end
unsigned long curtime; // what is the current time
int post_pulse_pause; // how long to wait after last pulse before sending pulse count
int pulse_state; // what is the current input line state (1 for high, 0 for low)
int last_state; // what was the last input line state

int min_cost_of_service; // Trigger service when this minimal number of cents have been received. //++
int max_cost_of_service; //++
void setup() {
  pinMode(INPIN, INPUT); // Pin 0 is the pin where the pulse output from the bill acceptor is connected. Change it
 // Serial.begin(115200); // You can comment all the Keyboard lines and uncomment all the serial lines to make it print to serial instead (useful for debugging)
  Keyboard.begin();
  pulse_begin = 0;
  last_state = 0;
  min_pulse_width = 40;
  max_pulse_width = 60;
  debounce_speed = 4;
  post_pulse_pause = 300;
  cents_per_pulse = 100;
  pulse_end = 0;
  pulse_count = 0;
  //cents_received = 0;//++
  cost_of_service = 1000;

  min_cost_of_service = 1000; //++
  max_cost_of_service = 4000;
}

void loop() {
  pulse_state = digitalRead(INPIN);
  curtime = millis();
  if((pulse_state == 1) && (last_state == 0)) { // this means we entered a new pulse
    pulse_begin = curtime; // save the begin time of the pulse
    last_state = 1; // set the previous state
  } else if((pulse_state == 0) && (last_state == 1)) { // this means a pulse just ended
    pulse_duration = curtime - pulse_begin; // calculate pulse duration
    if(pulse_duration > debounce_speed) { // ensure that we don't change state for very short (false) pulses (this is called debouncing)
      last_state = 0;
    }
    if((pulse_duration > min_pulse_width) && (pulse_duration < max_pulse_width)) { // check if the pulse width is between the minimum and maximum
      pulse_end = curtime; // save the end time of the pulse
      pulse_count++; // increment the pulse counter
    }
  }

  if((pulse_end > 0) && (curtime - pulse_end > post_pulse_pause)) { // check if we've waited long enough that we don't expect any further pulses to be forthcoming

    //cents_received += pulse_count * cents_per_pulse;//++
    //if(cents_received >= cost_of_service) { // check if enough money has been paid for the service//++
	if(pulse_count >= min_cost_of_service && pulse_count <= max_cost_of_service) {//++
     // Serial.print(pulse_count);
     // Serial.println();
     //Keyboard.write('z'); // Send a z keypress//++
		switch(pulse_count) { //++
		  case 1000: //++
			// £5, 1000 pulses. //++
			Keyboard.write('a'); //++
			break; //++
		  case 2000: //++
			// £10 2000 pulses. //++
			Keyboard.write('b'); //++
			break; //++
		  case 3000: //++
			// £20 3000 pulses. //++
			Keyboard.write('c'); //++
			break; //++
		  case 4000: //++
			// £50 4000 pulses. //++
			Keyboard.write('d'); //++
			break; //++
		}
      //cents_received = 0; // reset cents_received so it's ready for next payment//++
    }

    pulse_end = 0;
    pulse_count = 0;
  }

}
-
 1
1
-
-
This one is for Chris, truly the saddest time we have had to face as a community. R.I.P Chris and again thanks for all you did for us.
-
36
-
-
Only just heard the news truly devastating, MFME like most of us has been apart of my daily routine for years and has brought me many thousands of hours of joy re living my younger days.
thanks for everything you did Chris.
R.I.P
-
10
-
-
ive been dragging my feet with the release as the base art used was bad to say the least and so the layout is not good. i might upload later today if i get time to prepare the layout for release.
-
3
-
-
if your using the g540
-
1
-
-
38 minutes ago, Geddy said:
Yeah would love it.... would be very very handy. Does it just load the layout or load the gam thus needing the roms?
will pm link now, no roms needed it opens and closes the layout (well, mfme).
-
1
-
-
Hi Geddy, i made a tool a while back (will need to find it) that would open layouts and close them to save to new format that can be used to do a bulk of layouts if you want that?
edit: found it:
-
7
-
-
1. Extract contents of zip to a folder (.gam, .ram .fml and .bin etc)
2. Either open MFME and load the game by clicking 'File' > 'Load game' > Browse to folder you extracted the zip to then select the XXXXXX.gam to load the layout
or launch MFME then open the folder you extracted the contents of the zip to and find the XXXXX.gam file and drag and drop onto the MFME app window to load
-
Thanks for the info amusements, will have a dig and report back when i have got further
")
-
Hi All,
im going to start building an mfme cab but want to get my head around the hopper/coin mech requirements first.
im going to order this for the mech:
https://www.amazon.co.uk/gp/product/B07DKBF1ZV/ref=ox_sc_act_title_3?smid=A3MWTOW3Y5FBF1&psc=1
and this to power it:
https://www.amazon.co.uk/gp/product/B07D2BWC6M/ref=ox_sc_act_title_1?smid=A1YMYL2LX3TD52&psc=1
Can someone explain what i need in the middle between the mech and mfme, i know a usb controller board can be used but i want to insert credit based on the coin put into the mech and so i don't think this is what i need as that will only send a button press as far as im aware no matter what coin i put in.
Cheers.
Cab Friendly layouts
in Cabinet Building
Posted · Edited by Ross
Will be posting here when i add a cab friendly layout (im marking them as DSDX)
so far i have uploaded 2 but i have a few more to get uploaded so watch this space.
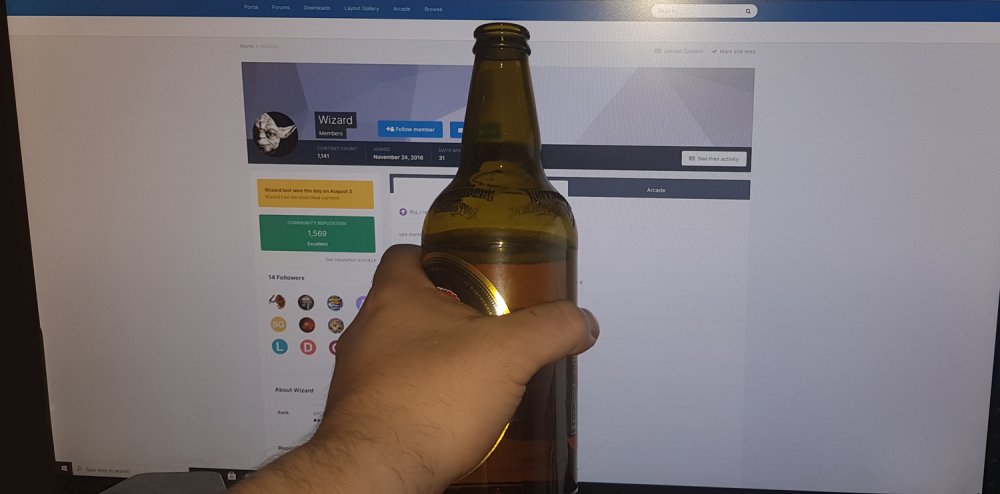
Beer Guide DSDX: